

How To Install Bifold Doors Home Depot
Synopsis: An experienced trim carpenter hangs a set of bifold doors on a closet, explaining why assembling jambs and casings together start makes the procedure faster and more accurate.
If you work equally a trim carpenter long enough, sooner or later you'll come to the realization that prefabricating components on a bench makes it easier to put them on the wall. I put this approach to work in all my trim-carpentry tasks. Simply in the case of installing bifold doors—the ubiquitous accordion-style panels that muffle many an American closet—the workbench is the flooring in front of the closet. The job starts with the jambs.
Unlike prehung doors, which are hinged to their jambs when they exit the manufacturing plant, bifold doors are typically shipped without the jambs. Instead, bifold doors are hinged to one another and packed in a cardboard box. The box also contains a bag full of hardware for hanging the doors. The doors illustrated hither, for example, included the 2400 serial Bi-Fold Door Hardware from Stanley. Detailed instructions for adjusting the hardware accompany the doors.
I typically purchase bifold doors from the same shop that supplies my passage doors. Along with the doors, I have the shop ship along finger-jointed pine jamb kits for the doors (I prefer pine considering nails driven into pino—unlike MDF, the other jamb-material option—don't leave telltale dimples that demand sanding).
Rough openings should be sized in a manner similar to those for passage doors by adding ii in. to the nominal dimension of the doors. For example, a 5-ft. 0-in. bifold requires a 62-in.-wide crude opening. That leaves enough room for the jambs (two at 5/viii in. each) plus some wiggle room for plumbing the jambs. I frame my rough openings to be 82-i/2 in. loftier from the subfloor. That's a standard 81-in. trimmer atop a 2x plate. Abrupt-eyed carpenters will note that fifty-fifty though they are called six-ft. 8-in. doors, bifold doors are really half-dozen ft. 7 in. tall. The missing inch allows room for the track at the top of the doors.
The jamb kits often include 1×1 moldings that are meant to conceal the edges of the doors around the sides and the door track. I think they're ugly. These clunky 1x1s give a tacked-on look to the trim that isn't in keeping with the wait of the passage doors. And then I leave out the 1x1s, preferring instead a detail that I learned from an ace end carpenter back in the 70s. Every bit shown in the article photos, I add a 1×2 to the caput jamb, and then conceal virtually of it with the same trim that cases the passage doors. I don't utilize any stops along the sides of the doors because the doors can easily be adjusted to maintain an even gap between their stiles and the jambs when the side jambs are aligned correctly. Bifold doors swing on pins instead of on the foliage hinges common to passage doors. The pins fit into predrilled holes in the top and bottom of the doors. With this system, most of the loads exerted by the doors are delivered to the pin brackets at the bottoms of the jambs. And then don't worry about heavy structural nailing through the jambs to keep the doors from sagging. You'll note in the photos that I put blocks under the pin brackets to keep them from being buried by rug. If the floor is to exist hardwood, leave out the blocks and install the doors after the hardwood is in place.
Hardware varies a scrap from brand to brand, just the principles are the same. The door closest to the jamb is the pivot door. Its mate is the guide door. The pivot bracket at the bottom of the jamb is fixed, only the pivot can be moved forth its serrated slot to fine-tune the pivot door'southward distance from the jamb. The pin at the height of the pin door fits into a subclass in the door track that can be adapted with a set screw. The pin in the guide door fits into a sliding, spring-loaded guide that snugs confronting the other pair of doors, holding them tightly together when closed.
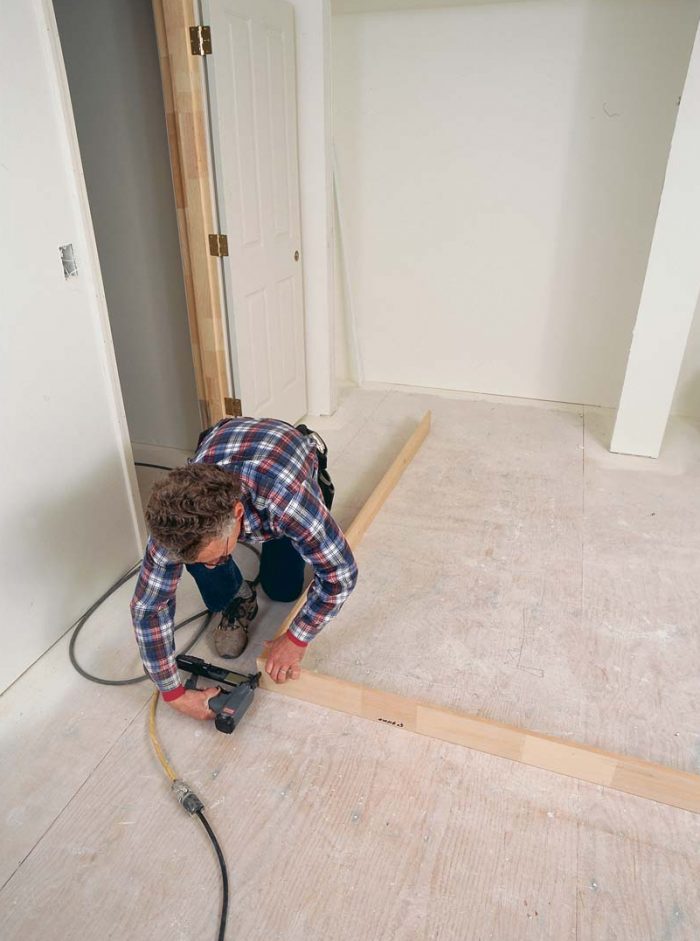 | 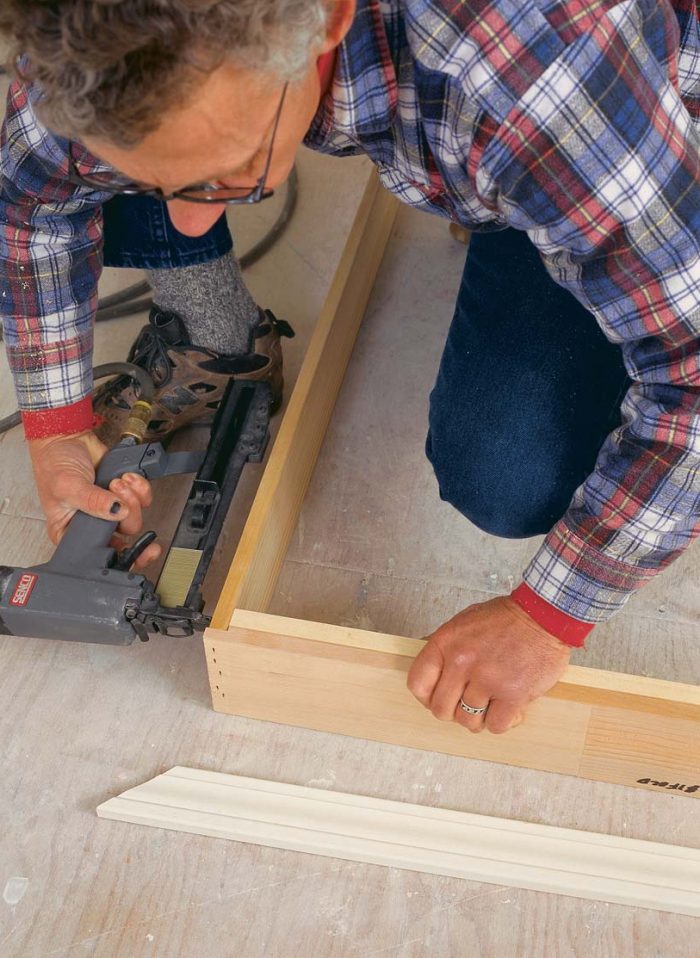 |
| i. Start by assembling the jamb. First, Britton spreads out the jamb parts in forepart of the closet. Then he uses a pneumatic stapler to anchor the side jamb to the caput jamb. | ii. A 1x strip hides the door runway. Once the jambs are assembled, the writer attaches a 1×ii to the inside of the caput jamb. The door track tucks against the behind of this strip. |
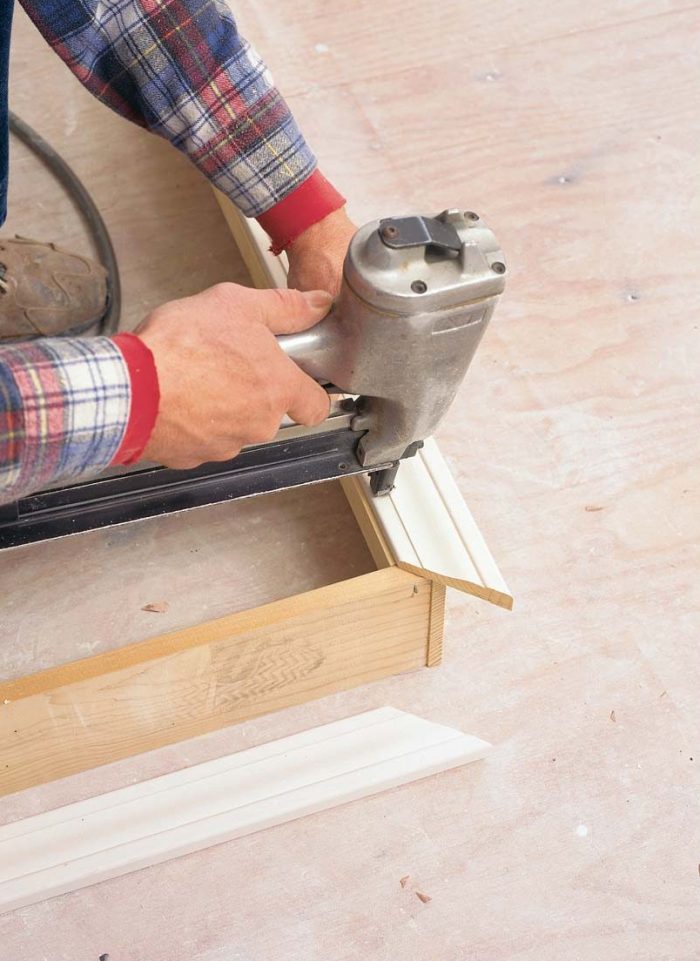 | 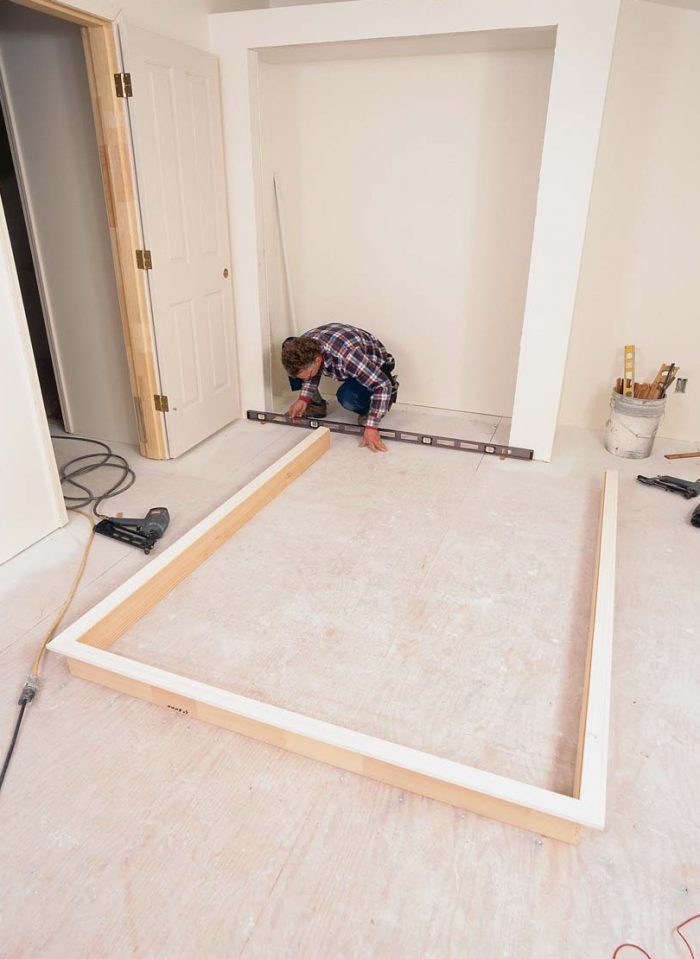 |
| iii. Side by side, nail the casings to the jamb stock. Leaving a 3⁄xvi-in. reveal around the inside edges of the jambs, Britton readies the jamb assembly past nailing on the casings. | 4. Shims drag the jambs. With a spirit level long plenty to bridge the rough opening, the author assesses the floor for level and places shims accordingly next to the trimmer studs. The shims, which are at least three⁄eight in. thick, lift the jambs enough to accommodate the carpet. |
 | 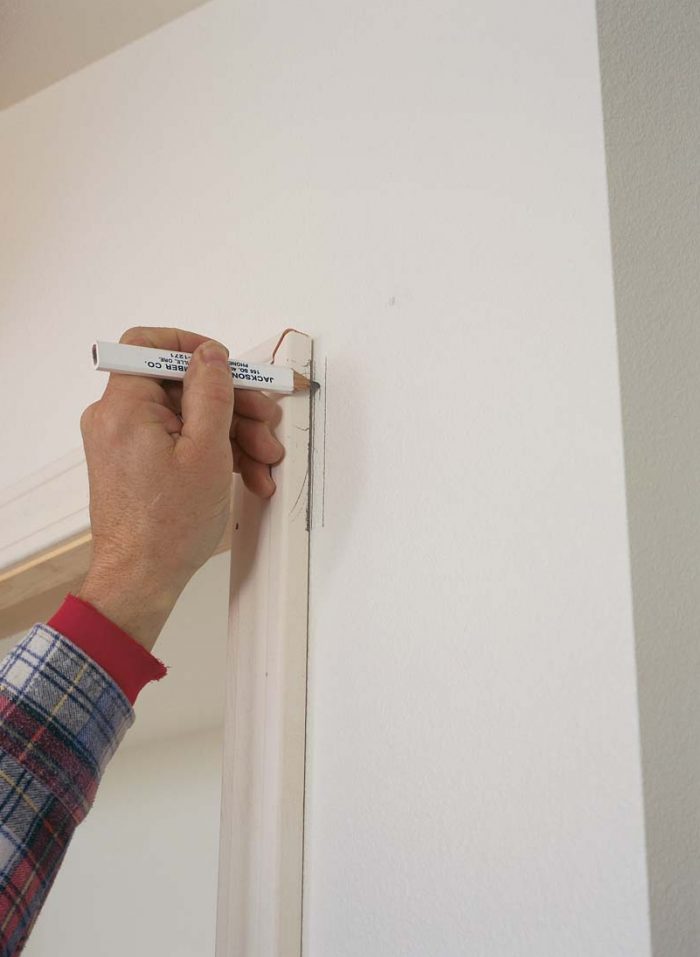 |
| 5. Lift the pretrimmed jamb into its opening. With the bottoms of the side jambs sitting on their shims to ensure a level head jamb, Britton slides the jamb assembly into the rough opening. Affixing it to the rough-opening frame starts from the elevation downwards. | vi. Center the head jamb. Next, Britton slides the assembly from right to left, and marks the positions with a pencil. Splitting the difference centers the jamb. 1 blast through the casing into the header maintains alignment at this stage. |
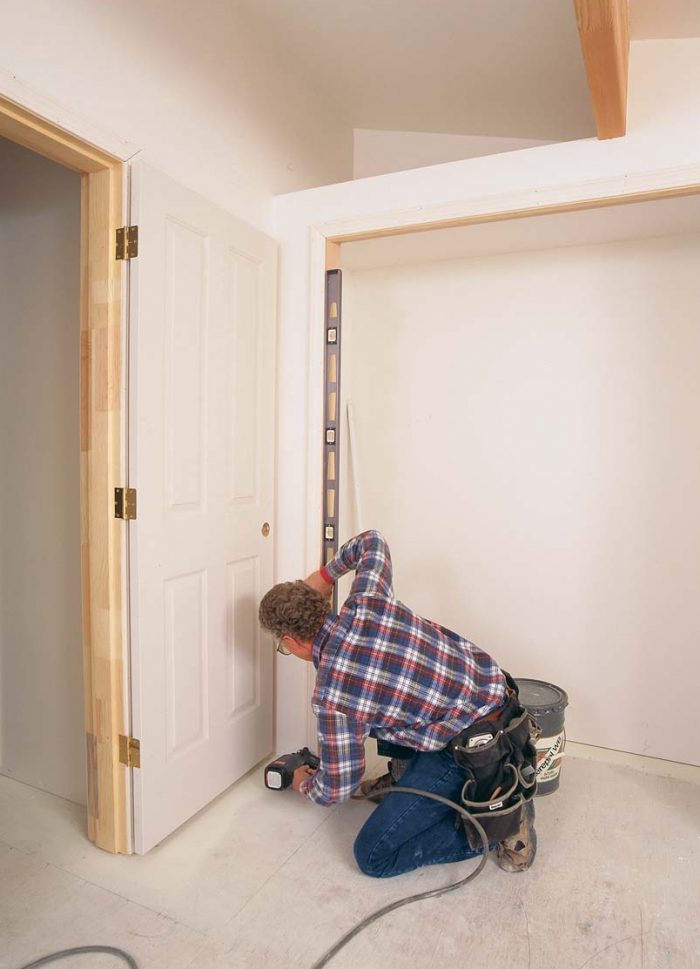 |  |
| 7. Plumb the side jamb. Britton uses the 6-ft. level to check the side jamb for plumb, moving the lesser of the jamb toward or abroad from the trimmer until the bubble is centered. Once he's got it right, he affixes the casing to the trimmer with a nail nigh the bottom of the jamb. | 8. Shim the jamb, and nail it abode. One time the jamb has been plumbed, it tin can exist permanently affixed to the trimmer. Britton uses a 15-ga. nailer, driving the fasteners through shims to proceed the jamb from deflecting toward the framing as the nails slam home. |
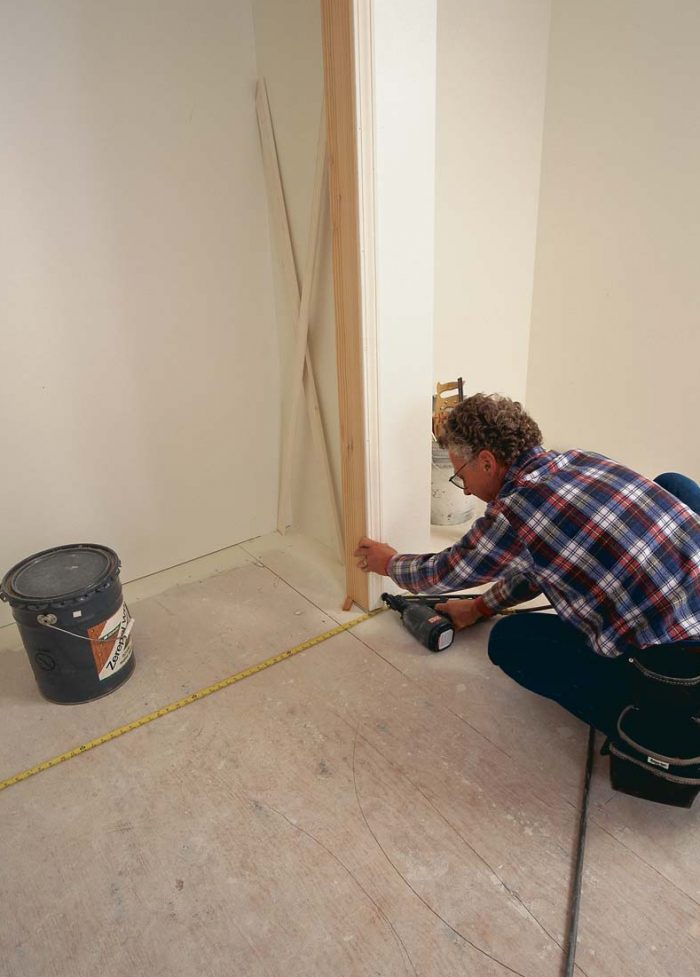 | 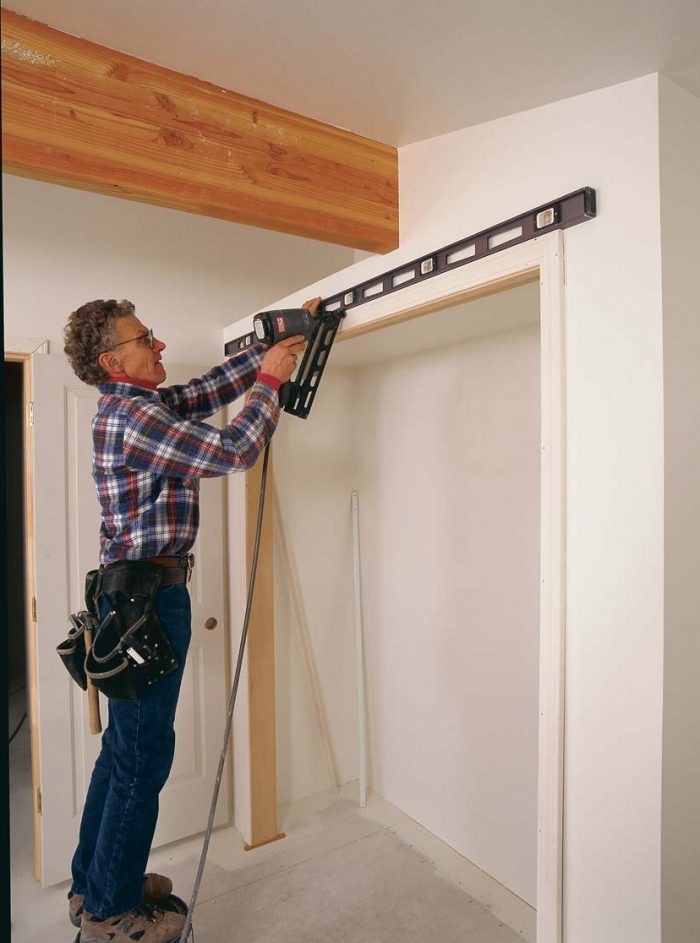 |
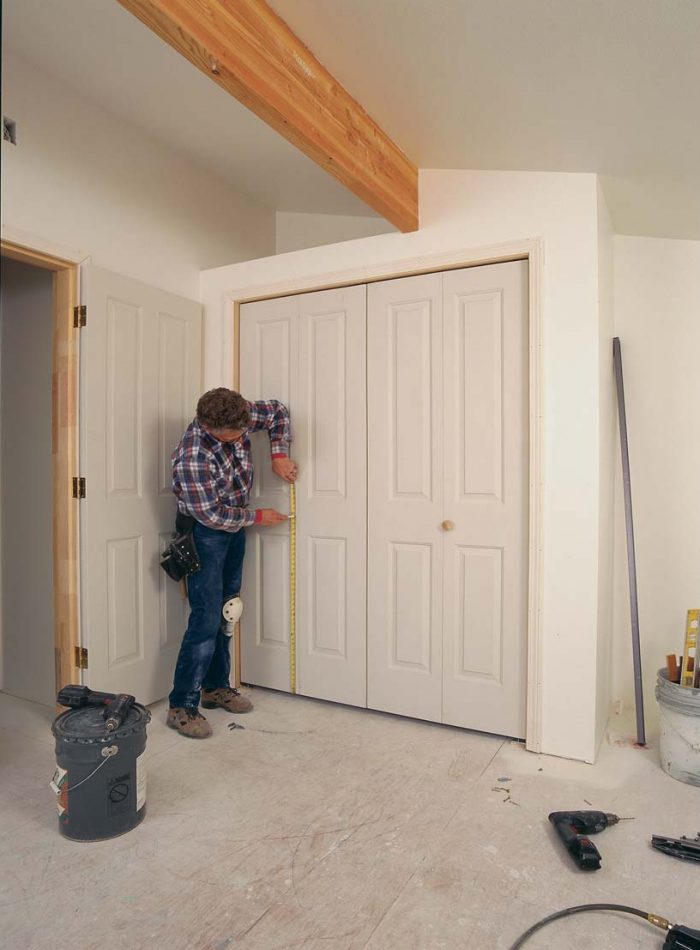
| nine. Now go to the other side. The bottom of the opposite jamb is located with a record measure out. The distance between the jambs at the top should be repeated hither. Double-check for square by measuring the diagonals from casing corners to jamb bottoms. | 10. The head casing gets nailed on final. Britton takes a slight bow out of the head casing by flattening information technology against the level as he nails the casing to the header. |
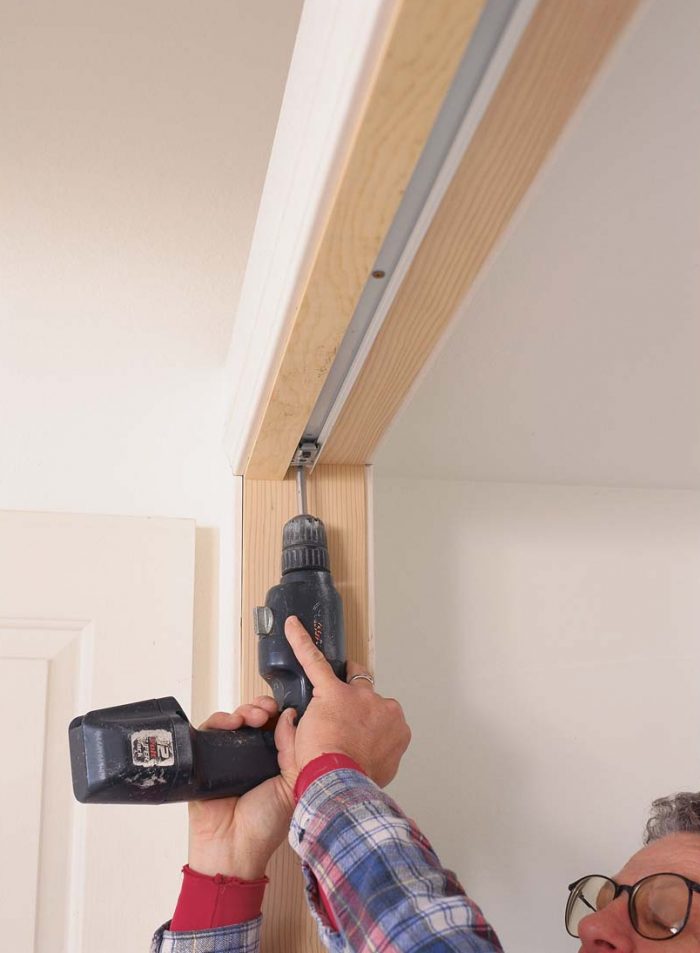 | 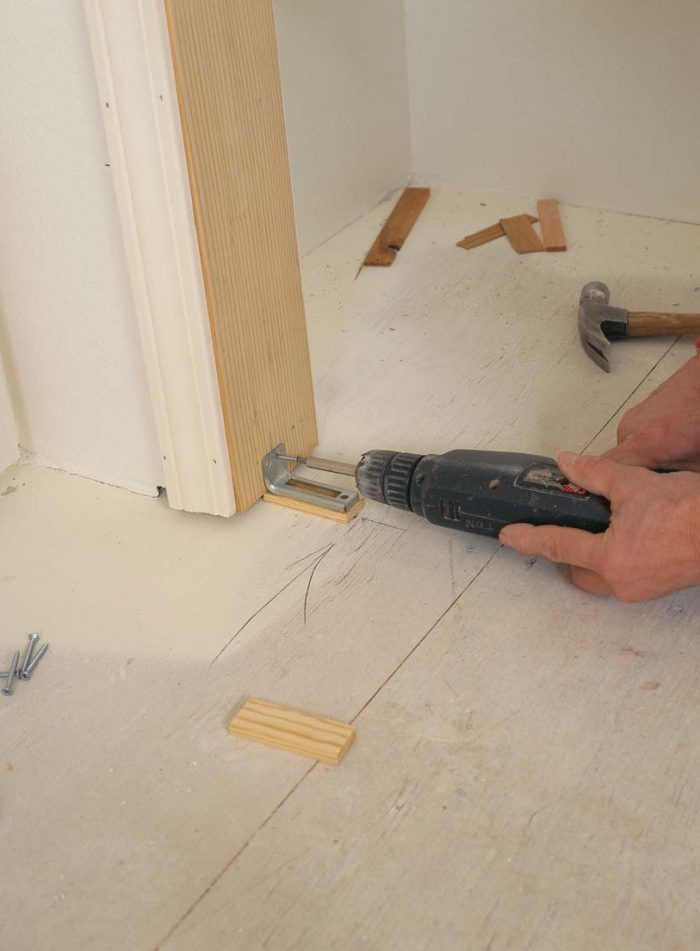 |
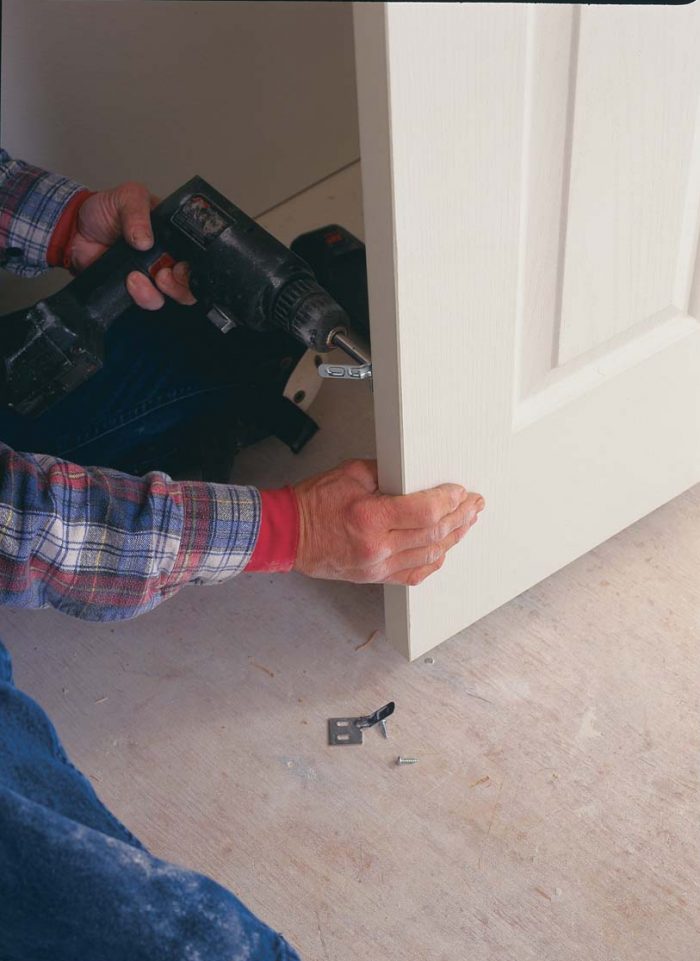
| 11. Screw the track to the head jamb. The door track fits flush against the 1×2 nailed to the inside of the head jamb. If the screws reach the header, exist sure to shim the jamb to go on information technology from deflecting. | 12. Align jamb brackets with the door track. At the base of each side jamb, an 50-shaped bracket supports a pivot pivot mounted in the lesser of the pivot door. The serrations in the slot capture the star-shaped pivot pivot at the bottom of the door, holding it at the desired distance from the jamb. The subclass sits atop a 3⁄8-in. thick plywood block, which keeps the bracket from being buried past the carpeting. A pencil mark on the side jamb notes the centerline of the door track in a higher place. |
13, fourteen. The doors swing on pins. At the top, each door has a spring-loaded pivot pin (photo left) that slides in the door rail. At the bottom, the door closest to the jamb has an adjustable pin that fits into the jamb bracket (photo right).
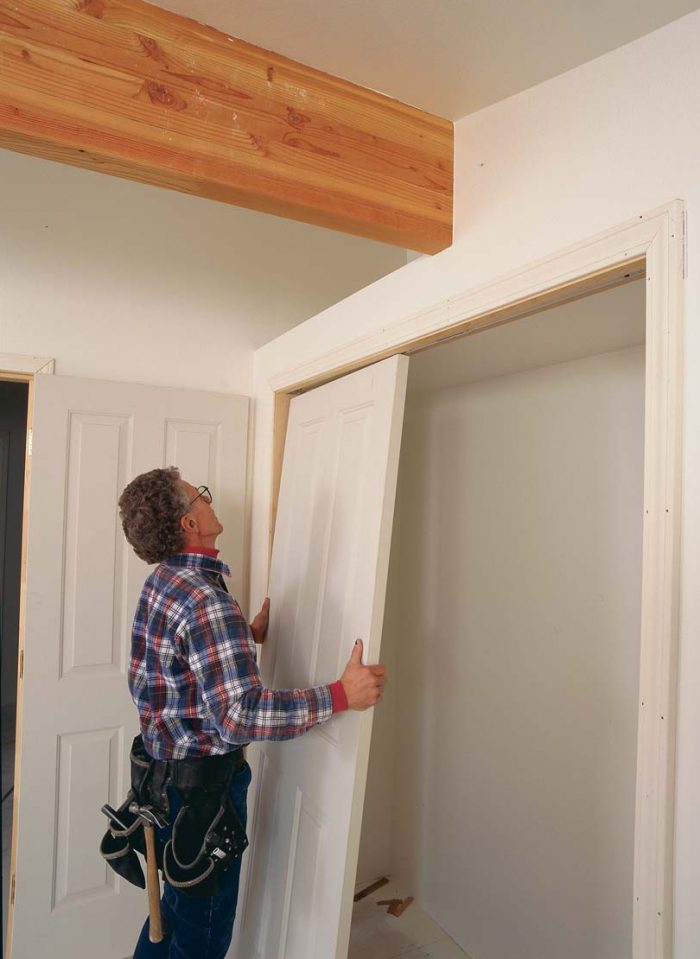 | 15. Install the doors from the top. Insert the top pivot pins into their slots, and push upwards to compress the springs. This makes room for the lower pivot to clear the jamb subclass every bit its pin is located in the serrated slot. |
 |  |
| 16. Gear up for knobs. The door closest to the jamb in a pair of bifold doors is called the pivot door. Its mate is chosen a guide door. You'll get the all-time leverage for opening and closing the doors by affixing the knobs to the pivot doors. | 17. Aligners keep the guide doors flush with one another. Metal tabs called aligners are installed well-nigh 12 in. in a higher place the floor on the backside of the bifold doors. As the doors are brought together, the aligners engage one some other to snap the doors closed. |
For more photos and details, click the View PDF push button below:

Source: https://www.finehomebuilding.com/project-guides/windows-doors/installing-bifold-doors
Posted by: perrinandill.blogspot.com
0 Response to "How To Install Bifold Doors Home Depot"
Post a Comment